You're about to tap into the full flavor potential of your coffee beans with a simple, yet nuanced, coffee dripper brewing process. Start by selecting the right coffee beans, considering origin, roast level, and flavor notes. Grind them just before brewing for maximum flavor, aiming for a medium-coarse grind size. Measure 30-40 grams of coffee for a standard 8-cup dripper and heat water to an ideal temperature between 195°F and 205°F. Assemble the dripper, pour water in a circular motion, and time the brewing process to complete within 3-4 minutes. Now, take the next step to perfect your brewing technique.

Key Takeaways

  • Select a medium-coarse grind size and freshly grind coffee beans just before brewing for optimal flavor and aroma.
  • Use a digital scale or coffee scoop to measure 30-40 grams of coffee for a standard 8-cup dripper, adjusting for smaller or larger drippers.
  • Heat water to an ideal temperature between 195°F and 205°F, and pour it over the coffee grounds in a circular motion to promote even saturation.
  • Assemble the coffee dripper according to the manufacturer's instructions, ensuring the paper filter is properly aligned and seated, and the device is clean and free of residual coffee oils.
  • Aim to complete the brewing process within 3-4 minutes, adjusting the pace to achieve the desired strength and flavor profile.

Choosing the Right Coffee Beans

When you're on the hunt for the perfect cup of coffee, you start by selecting the right coffee beans. This vital step sets the tone for the entire brewing process.

You'll want to think about two essential factors: bean origin and roast level.

The origin of your coffee beans can greatly impact the flavor profile of your coffee. Beans from regions like Ethiopia and Colombia tend to be bright and fruity, while those from Brazil and Sumatra are often smoother and nuttier. Think about the flavor notes you enjoy and choose a region that aligns with your taste buds.

Next, ponder the roast level. Lighter roasts bring out the coffee's natural acidity and fruit notes, while darker roasts provide a richer, more bitter taste.

If you're new to coffee, a medium roast is a great starting point. It offers a balanced flavor that's not too bright or too bold.

Grinding Coffee for Optimal Flavor

Now that you've selected the perfect coffee beans, it's time to release their full flavor potential by grinding them to the ideal consistency.

Freshly grinding your coffee beans is vital for maximum flavor, as pre-ground coffee can sit on a shelf for weeks or months, losing its flavor and aroma.

Invest in a good quality grinder that can produce a consistent grind size. Blade grinders can generate heat, which can damage the beans and result in a bitter taste. Instead, opt for a burr grinder that produces a consistent grind size and doesn't generate heat.

Regular grinder maintenance is essential to guarantee coffee freshness.

Clean your grinder regularly to prevent any buildup of old coffee oils and residue. This will prevent any stale flavors from affecting your freshly ground coffee.

When grinding your beans, aim for a medium-coarse grind size, which is ideal for a coffee dripper.

Experiment with different grind sizes to find the perfect one for your taste preferences.

Measuring Coffee for Perfect Balance

With a freshly ground medium-coarse grind, you're ready to measure out the perfect amount of coffee for your dripper.

Measuring coffee is vital to achieve the ideal coffee-to-water ratio, which is typically between 1:15 to 1:17. This means for every one gram of coffee, you'll use 15-17 grams of water.

To measure accurately, use a digital scale or a coffee scoop with marked increments. Aim for 30-40 grams of coffee for a standard 8-cup dripper. If you're using a smaller or larger dripper, adjust the amount accordingly.

When it comes to coffee ratios, a general rule of thumb is to use 1 tablespoon of coffee for every 6 ounces of water.

However, this can vary depending on your personal taste preferences and the type of coffee beans you're using. Experiment with different ratios to find your perfect balance.

Having the right measurement tools will guarantee you're consistent in your coffee-making process. Invest in a good digital scale and a coffee scoop, and you'll be well on your way to brewing the perfect cup of coffee.

Heating Water to Ideal Temperature

You'll need to heat water to an ideal temperature between 195°F and 205°F for perfect extraction. This temperature range allows for the ideal extraction of coffee's flavors and oils. Using water that's too hot can burn your coffee, while water that's too cold can result in a weak or under-extracted brew.

To achieve the ideal temperature, consider the following:

  • Use a thermometer to monitor the water temperature, ensuring it falls within the desired range.
  • Invest in a water purification system to remove impurities and minerals that can affect the taste of your coffee.
  • Choose a heating method that allows for precise temperature control, such as an electric kettle or a temperature-controlled pouring kettle.

Avoid overheating the water, as this can lead to a loss of oxygen and a less flavorful cup.

Experiment with different temperatures within the ideal range to find the perfect balance for your coffee beans.

Assembling the Coffee Dripper

Having reached the ideal water temperature, turn your attention to the coffee dripper, which needs to be assembled and prepared for the coffee grounds.

Start by ensuring your dripper is clean and free of any residual coffee oils. If you haven't already, incorporate a regular cleaning routine to prevent any buildup. This can be as simple as washing the dripper with soap and warm water after each use.

Now, place the paper filter in the dripper, making sure it's properly aligned and seated. The type of dripper materials you're using will dictate the specific assembly process, so refer to the manufacturer's instructions if needed.

For most drippers, you'll need to attach the filter holder to the top of the device. Take a moment to inspect the dripper for any signs of wear or damage, replacing any worn-out parts as necessary.

With your dripper assembled and ready, you're one step closer to brewing the perfect cup of coffee. Move on to the next step, pouring water for even saturation, to get the best results from your coffee dripper.

Pouring Water for Even Saturation

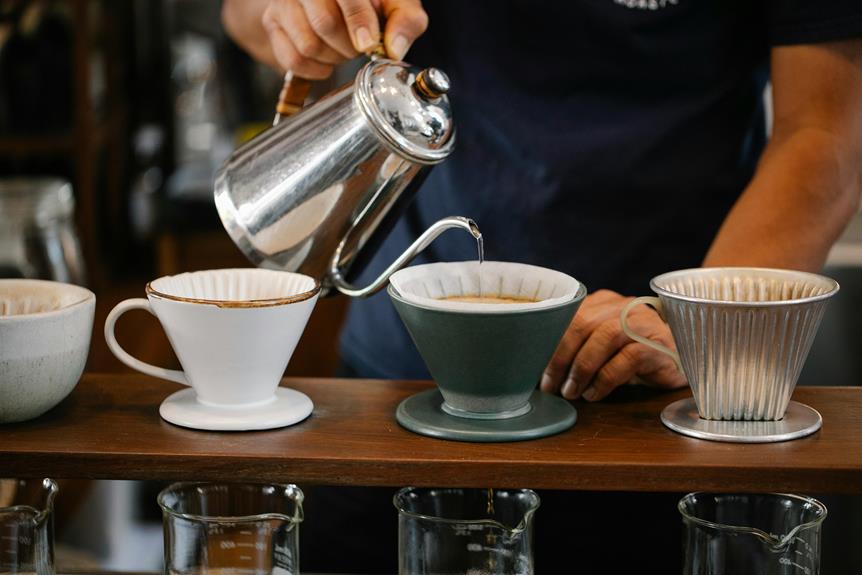
Now that your coffee dripper is assembled and ready, pour the heated water over the grounds in a circular motion to promote even saturation. This guarantees all grounds are exposed to the same amount of water, which is vital for a balanced flavor. As you pour, aim for a steady flow to maintain consistent water pressure. This will help prevent channeling, where water flows through the coffee too quickly, resulting in under-extraction.

Water flows from the center of the dripper, spreading evenly to the edges

The grounds are completely saturated, with no dry spots

The water level rises steadily, without sudden surges

You're pouring at a pace that allows for gentle flow control

The sound of the water flowing is steady and smooth, like a gentle hum

Timing the Brewing Process

Timing is crucial in the brewing process, as it directly affects the flavor and strength of your coffee, so aim to complete the process within 3-4 minutes.

You'll want to find a brewing pace that allows for even extraction without rushing or slowing down the process. If you're aiming for a stronger coffee, you can slow down the brewing pace to allow more time for the coffee grounds to steep. On the other hand, if you prefer a lighter coffee, you can speed up the process to reduce the steeping time.

As you wait for the coffee to drip, pay attention to the sound and pace of the dripping.

You should hear a steady, gentle dripping sound, indicating that the water is flowing at the right rate. If the dripping slows down or speeds up noticeably, you may need to adjust the grind of your coffee beans or the amount of water you're using.

Serving and Enjoying Your Coffee

You're left with a freshly brewed pot of coffee, and it's time to pour yourself a cup and savor the flavors you've carefully extracted. This is the moment you've been waiting for – the culmination of your coffee rituals. As you pour the steaming hot coffee into your cup, take a moment to appreciate the aroma and the fruits of your labor.

Find a cozy spot to sit and enjoy your coffee, whether it's on your porch, in your backyard, or at your kitchen table.

Take a sip and notice the flavors and notes that you've carefully crafted.

Savor the warmth of the coffee and the comfort it brings.

Share your coffee with friends or family and enjoy the conversation and company.

Take a moment to reflect on the coffee culture that brings people together and appreciate the simple joys in life.

Frequently Asked Questions

Can I Use a Coffee Dripper to Make Tea or Other Infused Beverages?

You can definitely use a coffee dripper for tea or other infused beverages, but be mindful of flavor profiles and steeping times, as they'll vary greatly from coffee, requiring adjustments for ideal results.

How Often Should I Clean and Descale My Coffee Dripper?

Like a master painter, you must clean and descale your coffee dripper regularly to prevent mineral buildup from tainting your brews. Check your water quality, and aim to descale every 3-6 months to keep your dripper in top shape.

Is It Necessary to Preheat the Coffee Dripper Before Brewing?

You're wondering if preheating your coffee dripper is necessary. Yes, it's essential! Preheating guarantees the dripper reaches the ideal temperature, around 195°F to 205°F, for perfect heating and extract the perfect flavor from your coffee beans.

Can I Use a Paper Filter in a Metal Filter Coffee Dripper?

You're wondering if you can use a paper filter in a metal filter coffee dripper. Yes, you can! This combo offers superior filter quality, and you can also explore filter alternatives like cloth or metal filters for a different flavor profile.

Will a Coffee Dripper Work With a Non-Standard Coffee Mug Size?

You'll need to check your coffee dripper's Mug Measurements to confirm Cup Compatibility, but generally, it'll work with most standard sizes; if not, consider a adjustable dripper or a travel mug with a built-in filter.

Conclusion

You've mastered the art of using a coffee dripper! Now, put your skills to the test.

Remember, the perfect cup is all about balance and harmony.

Take, for instance, Sarah, a busy professional who switched from instant coffee to a dripper.

By following these steps, she noticed a significant improvement in flavor and aroma, and her morning routine was transformed.

With every sip, she felt more energized and focused, ready to tackle the day ahead.
Gain a deeper understanding of the nuanced art of coffee dripper brewing to unlock the full flavor potential of your favorite beans.

You're likely brewing your coffee at the wrong temperature, which means you're not getting the flavor you deserve from your carefully selected beans. The ideal brewing temperature falls between 195°F and 205°F, but it's not that simple. Different beans and brewing methods require unique temperatures to bring out their full potential. For example, lighter roasts thrive at lower temperatures, while darker roasts benefit from higher temperatures. By understanding the temperature nuances of your coffee beans and brewing method, you can tap into a world of flavors. Now, take the next step in perfecting your brewing temperature and discover the flavors you've been missing.

Key Takeaways

  • The ideal brewing temperature range for coffee is between 195°F and 205°F, with variations depending on bean origin and roast level.
  • Understanding the optimal temperature for specific coffee beans is crucial to bring out their unique flavor profiles and characteristics.
  • Factors like water quality, brewing method, grind size, and coffee-to-water ratio all impact the ideal brewing temperature and extraction process.
  • Investing in a high-quality thermometer with a high level of precision (e.g., ±0.1°C accuracy range) is essential for accurate temperature measurement.
  • Experimenting with different temperatures and brewing methods can help develop a nuanced understanding of coffee and perfect your brewing technique.

Understanding Coffee's Temperature Spectrum

As you venture into the world of coffee brewing, recognizing that temperature has a pivotal role, and grasping the ideal temperature spectrum is key to achieving the perfect cup.

The ideal temperature range for brewing coffee falls between 195°F and 205°F.

Within this spectrum, you'll find that different temperatures bring out unique flavor profiles depending on the bean origins.

For instance, lighter roasts from African bean origins tend to thrive at lower temperatures, showcasing bright acidity and fruity notes.

On the other hand, darker roasts from South American bean origins benefit from higher temperatures, which accentuate their rich, caramel-like flavors.

Understanding the ideal temperature for your specific coffee beans allows you to tap into their full potential.

By experimenting within the ideal temperature range, you'll be able to find the perfect balance that brings out the desired flavor profiles in your cup.

This delicate balance will elevate your coffee game, and you'll be well on your way to brewing like a pro.

Factors Affecting Brewing Temperature

Five key factors influence the brewing temperature, and understanding their effects is essential to achieving the perfect cup. As you experiment with different brewing methods, you'll notice that these factors can profoundly impact the final flavor.

First, the origin of your coffee beans plays a substantial role. Beans from different regions have unique characteristics that respond better to specific temperature ranges. For instance, African beans tend to thrive at higher temperatures, while Asian beans prefer a slightly cooler brew.

Next, the quality of your water can't be overstated. Impurities in your water can alter the temperature and affect the extraction process. If your water is too hard or soft, it may require adjustments to the brewing temperature to achieve the perfect balance.

Additionally, the type of brewing method, grind size, and ratio of coffee to water also influence the brewing temperature. By understanding how these factors interact, you'll be able to make adjustments to find the perfect temperature for your unique coffee setup.

Measuring Temperature Accurately Matters

How accurate is your temperature measurement, and could it be making or breaking your perfect cup of coffee?

You might be surprised at how often temperature readings can be off, affecting the flavor and quality of your brew. Measuring temperature accurately is vital, and it starts with calibration importance. You need to verify your thermometer is calibrated correctly to give you precise readings. Don't assume it's accurate out of the box – take the time to calibrate it regularly.

Investing in precision tools can make all the difference. A high-quality thermometer will give you accurate readings, allowing you to adjust your brewing temperature with confidence. Look for thermometers with a high level of precision, such as those with a ±0.1°C accuracy range.

With the right tools, you'll be able to pinpoint the perfect temperature for your brewing method, guaranteeing a consistently delicious cup every time. Don't compromise on accuracy – it's worth the investment to get it right. By prioritizing precise temperature measurement, you'll be well on your way to brewing coffee that's truly exceptional.

The Ideal Temperature for Each Method

Different brewing methods require unique temperature ranges to bring out their distinct flavor profiles.

The ideal temperature range for drip brewing is between 195°F and 205°F, which allows for a balanced extraction of flavors. French press, on the other hand, benefits from a slightly lower temperature range of 190°F to 200°F, resulting in a richer and more full-bodied flavor.

When it comes to pour-over and Chemex, a temperature range of 198°F to 202°F is ideal, as it allows for a clean and nuanced extraction. Espresso, with its high-pressure brewing process, requires an even more precise temperature range of 195°F to 203°F to achieve that perfect shot.

Understanding these temperature ranges is essential in accessing the perfect brewing profiles for each method. By dialing in the right temperature, you'll be able to bring out the unique characteristics of your coffee beans and enjoy a more satisfying cup.

Common Temperature Mistakes to Avoid

As you experiment with different brewing methods, you must take great care to avoid temperature mistakes that can greatly impact the flavor and quality of your coffee.

One common mistake is brewer bias, where you unknowingly favor a specific brewing method or temperature, leading to inconsistent results.

To avoid this, try switching between methods or temperatures to develop a more nuanced understanding of your coffee.

Another mistake is thermal shock, which occurs when you expose your coffee beans to extreme temperature changes.

This can happen when you grind your beans just before brewing and then immediately expose them to hot water.

Thermal shock can cause your coffee to taste bitter or unpleasantly bright.

To avoid thermal shock, try grinding your beans at room temperature or just before brewing, and then brew your coffee at the ideal temperature for your chosen method.

Experimenting to Find Your Sweet Spot

With every brew, you're on a mission to pinpoint the perfect balance of flavor and temperature, so start by tweaking the thermometer to find your sweet spot. Don't be afraid to experiment with trial batches to get it just right. After all, perfecting your coffee brewing temperature is a process that requires some trial and error.

Start with small increments: Try adjusting the temperature by 0.5°C to 1°C at a time to see how it affects the flavor.

Pay attention to flavor profiles: Notice how different temperatures bring out different notes in your coffee, and adjust accordingly.

Trust your taste buds: Ultimately, it's about finding a temperature that you enjoy, so don't be swayed by what others say is 'optimal' – it's all about your personal preferences.

Frequently Asked Questions

Can I Use a Thermometer From My Kitchen to Measure Coffee Temperature?

You can use your kitchen thermometer, but make certain it's digital for accuracy. Before measuring coffee temperature, calibrate it in your kitchen to guarantee precise readings, as even slight variations can affect flavor.

Does the Type of Coffee Bean Affect the Ideal Brewing Temperature?

You've heard the myth that lighter roasts require lower temps, but is it true? Actually, yes! Lighter roasts from certain bean origins are more delicate, so they do benefit from slightly lower brewing temperatures to prevent bitterness.

Can I Adjust the Grind Size to Compensate for Incorrect Temperatures?

You can tweak the grind size to compensate for incorrect temperatures, but it's not a perfect fix. Adjusting the grind profile will affect the flavor balance, but it won't fully make up for temperature mistakes, so try to get the temp right too.

How Often Should I Calibrate My Thermometer for Accurate Readings?

Ha! You think you're so precise with your coffee temps, but when's the last time you checked your thermometer's accuracy? Calibrate it every 1-3 months for perfect Thermometer Maintenance, ensuring consistent Calibration Frequency and, you know, decent coffee.

Will a Temperature-Controlled Coffee Maker Eliminate All Temperature Issues?

You think a temperature-controlled coffee maker is the solution to all temperature issues, but it's not that simple. Machine limitations and user errors can still occur, even with a high-tech brewer, so don't get too comfortable.

Conclusion

You've finally nailed the perfect brewing temperature, and now your coffee is so good it's almost… boring.

The thrill of the chase is over, and you're left with a consistent, predictable cup every time.

But don't worry, you can always experiment with new roasts, beans, or methods to shake things up.

After all, there's no such thing as a 'perfect' cup of coffee – just a perfect excuse to keep trying.

Boost your coffee's flavor profile by mastering the ideal brewing temperature, a subtle art that can make all the difference.

You're deciding between the Aeropress and French Press, but which one brews the perfect cup? The Aeropress offers a smoother, full-bodied coffee with a cleaner flavor profile, while the French Press brings a rich, bold flavor with a thicker texture. However, the Aeropress requires more effort and technique, while the French Press is easy to use and clean. Weighing the pros and cons, you'll find the Aeropress is ideal for those who want a nuanced flavor, while the French Press suits those who crave a bold, rich cup. Now, take a closer look at what sets these brewing methods apart.

Key Takeaways

  • Aeropress brews a smoother coffee with a cleaner flavor profile, while French Press yields a richer, bolder flavor with a heavier body.
  • Aeropress requires more effort and technique, whereas French Press is easy to use and clean, making it suitable for beginners.
  • Aeropress is less portable due to its size and shape, whereas French Press is more compact and travel-friendly.
  • Aeropress produces a cleaner flavor with less oil and sediment, whereas French Press preserves oils and sediment, adding to the coffee's richness.
  • Both brewing methods offer unique advantages, and the choice ultimately depends on individual taste preferences and coffee habits.

Aeropress Advantages and Benefits

When you switch to an Aeropress, you'll appreciate its ability to brew a smoother, full-bodied coffee with a cleaner flavor profile, thanks to its unique brewing mechanism that minimizes bitterness and acidity.

This smooth flavor is a result of the Aeropress's total immersion brewing method, which allows all the coffee grounds to be saturated evenly, extracting the perfect amount of flavor. You'll notice the difference in every sip, as the Aeropress brings out the subtle notes and nuances of your favorite coffee beans.

Another advantage of the Aeropress is its easy cleaning feature. The brewer's smooth, non-porous surfaces and detachable parts make cleaning a breeze, saving you time and effort.

You can simply rinse the Aeropress with warm water, and it's ready for its next use. This hassle-free maintenance guarantees you can focus on what matters most – enjoying your perfect cup of coffee.

With the Aeropress, you can say goodbye to bitter flavors and tedious cleaning, and hello to a smoother, more enjoyable coffee experience.

French Press Perks and Drawbacks

French presses bring a rich, bold flavor to your coffee, thanks to their immersion brewing method that allows the coffee grounds to steep in hot water.

This process extracts more oils and sediment from the beans, resulting in a thicker, more velvety texture and a deeper flavor profile. As a result, French press coffee is often described as rich, bold, and full-bodied.

If you're looking to experience the full range of flavors in your coffee, a French press is an excellent choice.

In the world of coffee culture, French presses are revered for their ability to bring out the nuances of specialty coffee beans. They're also incredibly easy to use and clean, making them a great option for coffee enthusiasts of all levels.

However, one drawback is that the immersion brewing method can result in a higher caffeine content and a grittier texture due to the sediment at the bottom of the cup.

Aeropress Downsides and Limitations

Despite its versatility and popularity, the Aeropress has some downsides and limitations that might make it less suitable for certain coffee enthusiasts, particularly those who prioritize convenience and ease of use.

For instance, you might find the cleaning process a bit tedious, as the Aeropress's many parts require disassembly and thorough scrubbing after each use. This can be a real Cleaning Hassles, especially if you're short on time or not a fan of doing dishes.

Another limitation you might encounter is the Portability Issues. While the Aeropress is relatively lightweight, its size and shape can make it tricky to pack in a suitcase or backpack, especially if you have limited space. This can be a drawback for travelers or outdoor enthusiasts who want to bring their coffee game on the go.

Additionally, you might find that the Aeropress requires a bit more effort and technique to produce a perfect cup, which can be overwhelming for beginners.

French Press Upsides and Strengths

One of the most significant advantages of French Press coffee is that it's incredibly easy to use, requiring minimal effort and technique to produce a rich, full-bodied cup.

You simply add coarse coffee grounds to the press, pour in hot water, and wait a few minutes before pressing the plunger. Voilà! You'll be rewarded with a cup that's bursting with flavor and aroma.

The French Press's immersion brewing method allows the coffee grounds to steep in the water, which results in a more nuanced flavor profile.

You'll experience a deeper, more velvety coffee richness that's hard to replicate with other brewing methods. The oils and sediment from the coffee beans are preserved, adding to the overall flavor and body of the coffee.

Plus, the French Press gives you complete control over the brewing process, so you can experiment with different coffee-to-water ratios, steeping times, and grind sizes to find your perfect cup.

Brewing Methods Compared Side-by-Side

Your brewing experience is about to get a whole lot clearer as we explore a side-by-side comparison of the Aeropress and French Press brewing methods.

In the world of coffee culture, understanding the nuances of each brewing method is vital to achieving the perfect cup.

From a brewing science perspective, the Aeropress and French Press methods differ substantially.

The Aeropress uses air pressure to extract flavors, resulting in a smooth, full-bodied coffee with a clean finish.

On the other hand, the French Press relies on steeping coarse coffee grounds in hot water, which yields a richer, more oil-rich coffee with a heavier body.

When it comes to grind size, the Aeropress requires a fine to medium grind, while the French Press can handle a coarser grind.

Brewing time also varies, with the Aeropress taking around 2 minutes and the French Press taking around 4-5 minutes.

By understanding these key differences, you'll be able to discover the brewing method that suits your taste preferences and coffee habits.

Frequently Asked Questions

Can I Use Aeropress or French Press for Cold Brew Coffee?

You can definitely use either method for cold brew, but keep in mind that Aeropress requires a shorter steeping time, while French Press needs a longer one, so adjust accordingly for your perfect cup.

Are Aeropress and French Press Dishwasher Safe?

"Fast forward to the 21st century, you'll be relieved to know that both Aeropress and French Press are not dishwasher safe, so you'll need to stick to manual cleaning methods, prioritizing safety features like gentle scrubbing to avoid damage."

Can I Grind My Own Coffee Beans for These Brewers?

You can definitely grind your own coffee beans for a fresh grind, and it's recommended to use burr mills for a consistent grind size, which will enhance the flavor of your brewed coffee.

Do Aeropress and French Press Come With a Coffee Scoop?

You're wondering if your new brewer comes with a scoop? Typically, no, Aeropress and French Press don't include a coffee scoop, but you might find bundle deals that throw one in – always check the package contents before buying!

Are There Any Travel Cases Available for These Coffee Brewers?

"When you're on the go, you'll want to 'cover your bases' with portable protection for your coffee brewer. Luckily, you can find compact carrying cases for both Aeropress and French Press, keeping them safe and secure in transit."

Conclusion

You've weighed the pros and cons, and now it's time to make your move. When it comes down to it, the Aeropress and French Press are like two different roads that lead to the same delicious destination.

You've got to choose the one that suits your style and brewing preferences.

So, take a deep breath, and immerse yourself into the world of specialty coffee – the grass is always greener on the other side, and in this case, it's brewed to perfection!

Achieve the perfect cup of coffee by understanding the distinct differences between Aeropress and French Press brewing methods.

You're already a coffee connoisseur, but you're about to discover the game-changing gadgets that will take your brewing skills to the next level and reveal flavors you never knew existed. From precision temperature controllers that extract the perfect amount of flavor and oils from beans, to automated pour-over machines that streamline the brewing process, advanced coffee grinders that release the full potential of coffee beans, and smart coffee scales that guarantee a consistently balanced brew. And that's just the beginning. You're on the cusp of a brewing revolution – get ready to uncover the secrets of the perfect cup.

Key Takeaways

  • Precision temperature controllers ensure ideal heat retention, extracting the perfect amount of flavor and oils from coffee beans.
  • Automated pour-over machines streamline the brewing process, guaranteeing a balanced cup with nuanced flavor every time.
  • Advanced coffee grinders provide precise control over grind size and distribution, releasing the full potential of coffee beans.
  • Smart coffee scales enable exact measurement of coffee and water, ensuring a consistently balanced brew and allowing for experimentation.
  • Coffee brewing timers guarantee perfect steeping time, resulting in a more balanced flavor and allowing for multitasking.

Precision Temperature Controllers

You can take your coffee brewing to the next level with precision temperature controllers, which allow you to dial in the perfect temperature for your specific coffee beans.

This level of control is vital, as even a single degree can affect the flavor profile of your coffee.

With temperature profiling, you can experiment with different temperature ranges to find the sweet spot for your beans. For example, you might find that your Ethiopian beans thrive at 198°F, while your Brazilian beans prefer 202°F.

Precision temperature controllers also guarantee ideal heat retention, which is essential for maintaining a consistent brew. You'll no longer have to worry about your coffee getting too hot or too cold during the brewing process.

By maintaining the perfect temperature, you'll extract the ideal amount of flavor and oils from your beans, resulting in a more nuanced and balanced cup.

With a precision temperature controller, you'll be able to reveal the full potential of your coffee beans and take your brewing skills to new heights.

Automated Pour-Over Machines

Automated pour-over machines streamline the brewing process, allowing for a perfectly balanced cup every time, without the need for manual pouring and monitoring.

You'll appreciate the precision and consistency they bring to your daily coffee rituals.

With these machines, you can focus on the artistry of brewing, experimenting with different roasts and ratios, while they handle the tedious task of pouring the water.

These machines are designed to mimic the manual pour-over process, but with greater accuracy and speed.

You can adjust the brewing parameters to suit your taste preferences, and they'll take care of the rest.

The result is a cup of coffee that's both nuanced and rich, with a depth of flavor that's hard to achieve manually.

Advanced Coffee Grinders

Advanced coffee grinders, like the Baratza Virtuoso+, release the full potential of your coffee beans, allowing you to precisely control the grind size and distribution.

With these grinders, you'll notice a significant difference in the flavor and aroma of your coffee. You'll be able to adjust the grind to suit your brewing method, whether it's espresso, pour-over, or French press.

One of the key benefits of advanced grinders is their ability to produce grind consistency. This means that every particle is uniform in size, ensuring that your coffee tastes the same every time.

You won't have to worry about some particles being over- or under-extracted, which can lead to bitter or sour flavors. Regular burr maintenance is also a breeze with these grinders. You can easily clean and replace the burrs to prevent any buildup or wear and tear.

This will keep your grinder performing at its best and prevent any damage to the machine. With an advanced coffee grinder, you'll be able to tap into the full potential of your coffee beans and enjoy a perfect cup every time.

Smart Coffee Scales

Precisely measuring coffee and water with smart coffee scales guarantees a consistently balanced brew, every time.

You'll never have to worry about over- or under-extracting your coffee again. With scale accuracy, you can confirm the perfect ratio of coffee to water, every single time.

This level of precision takes your brewing ritual to the next level, allowing you to experiment with new roasts and brewing methods with confidence.

Smart coffee scales also make it easy to track your coffee consumption and adjust your brewing parameters accordingly.

You can monitor your coffee-to-water ratio, brewing time, and even the total weight of your coffee. This data helps you refine your brewing technique and find your perfect cup.

Plus, many smart coffee scales come with built-in timers and alarms, so you can focus on other things while your coffee brews.

With a smart coffee scale, you'll be able to dial in your brewing ritual and enjoy a consistently amazing cup of coffee, every time.

Coffee Brewing Timers

You can take control of your brewing process with coffee brewing timers, which guarantee you steep your coffee for the perfect amount of time.

These devices certify that your coffee is never under- or over-extracted, resulting in a more balanced flavor.

By setting the timer to the ideal brew timing for your preferred coffee method, you can achieve consistency in every cup.

Incorporating a coffee brewing timer into your coffee routines can be a game-changer.

It allows you to multitask while your coffee brews, knowing that it'll be ready exactly when you want it.

Whether you're brewing a pour-over, French press, or drip coffee, a timer takes the guesswork out of the process.

You can experiment with different brew timings to find the perfect balance for your taste preferences.

With a coffee brewing timer, you'll be able to refine your coffee-making skills and enjoy a better cup every time.

Milk Frothing Wands

Silky microfoam and velvety textures are within your reach with milk frothing wands, which whip air into milk at the touch of a button.

These gadgets are a game-changer for coffee enthusiasts who want to elevate their lattes and cappuccinos. With a milk frothing wand, you can achieve professional-level froth quality in the comfort of your own home.

Simply submerge the wand in cold milk, turn it on, and watch as it whips the milk into a creamy, velvety foam.

To get the best results, make sure to clean your wand regularly.

Wand maintenance is key to preventing bacterial growth and ensuring your froth stays silky smooth.

A quick rinse under warm water and a gentle scrub with soap should do the trick.

By taking good care of your wand, you'll be able to enjoy perfectly frothed milk every time.

With a little practice, you'll be whipping up café-quality drinks in no time!

Frequently Asked Questions

Can I Use Coffee Brewing Gadgets With Non-Traditional Coffee Beans?

You can experiment with non-traditional coffee beans using brewing gadgets, but be aware that unique bean varieties and roast levels might require adjustments to brewing times and temperatures for ideal flavor extraction.

Are Coffee Brewing Gadgets Compatible With Different Voltage Outlets?

You're wondering if your coffee brewing gadgets can handle different voltage outlets while traveling. Yes, you can use voltage converters or travel adapters to guarantee compatibility, making your gadgets work seamlessly abroad.

Do Coffee Brewing Gadgets Require Regular Cleaning and Maintenance?

You'll need to clean and descale your brewing gadgets regularly to prevent coffee residue buildup. Descaling frequency depends on usage, but aim for every 3-6 months to keep your gear in top shape.

Can Coffee Brewing Gadgets Be Used for Other Types of Beverages?

You think coffee brewing gadgets are one-trick ponies, but surprise! They're versatile tools that can brew more than just coffee. Try using them for tea infusion or herbal steeping – you'll be amazed at the flavors you can extract.

Are Coffee Brewing Gadgets Suitable for Commercial or Heavy Use?

You're wondering if coffee brewing gadgets can handle heavy use? Look for ones built with industrial durability and high volume capacity to guarantee they can keep up with your commercial demands without breaking a sweat.

Conclusion

As you elevate your coffee game with these gadgets, you're not just brewing a drink – you're crafting an experience.

The precision temperature controller is the conductor, orchestrating the perfect harmony of flavors.

The automated pour-over machine is the artist, carefully pouring each stroke.

The advanced coffee grinder is the alchemist, transforming beans into liquid gold.

With these tools, you're not just making coffee – you're creating a masterpiece, one cup at a time.

Ignite your coffee passion with cutting-edge gadgets that will transform your brewing skills and unlock flavors you never thought possible.

You expect your espresso machine to deliver a perfect shot every time, but neglecting regular maintenance can lead to subpar brews, machine malfunction, and even breakdowns. Start by wiping down the exterior and emptying the drip tray daily. Clean the brew head and portafilter regularly to prevent old coffee residue from affecting the taste. Descaling every 3-6 months and backflushing removes built-up residue and mineral deposits. Don't forget to inspect and replace seals and gaskets, and replace the water filter every 3-6 months. By following these essentials, you'll be well on your way to brewing perfect shots – and there's more to learn about keeping your machine in top shape.

Key Takeaways

  • Daily maintenance tasks, like wiping down the exterior and cleaning the brew head, ensure the espresso machine runs smoothly and efficiently.
  • Descaling the machine every 3-6 months prevents lime scale buildup, which can severely impact its performance and longevity.
  • Regular cleaning of the group head, steam wand, and boiler prevents buildup and contamination, maintaining optimal performance and flavor.
  • Inspecting and replacing seals, gaskets, and water filters regularly prevents serious issues and ensures consistent taste and quality of espresso.
  • Scheduling regular deep cleaning and descaling helps remove built-up residue and mineral deposits, improving the machine's overall performance and longevity.

Daily Cleaning Essentials

You'll want to wipe down the exterior of your espresso machine with a damp cloth every day to remove any splatters or spills that can attract dust and dirt.

This daily routine will prevent stubborn stains from forming and keep your machine looking its best.

Next, focus on the drip tray, which can quickly become a breeding ground for bacteria and old coffee oils.

Empty and wash it daily, making sure to dry it thoroughly to prevent water spots.

Incorporating these daily tasks into your cleaning schedule will guarantee your espresso machine runs smoothly and efficiently.

It's also essential to clean the brew head and portafilter regularly to prevent old coffee residue from affecting the taste of your brew.

By dedicating a few minutes each day to these tasks, you'll be able to enjoy perfect shots every time.

Descaling for Optimal Performance

Descaling your espresso machine regularly is essential to prevent lime scale buildup, which can severely impact its performance and longevity.

You see, lime buildup can clog up your machine's tubes and pipes, causing it to work harder to produce your daily cup. This can lead to increased energy consumption, slower brewing times, and even machine failure.

Scale formation is a common issue in areas with hard water, so it's vital to stay on top of descaling.

To descale your machine, you'll need a descaling solution and a water reservoir. Follow the manufacturer's instructions to mix the solution with water, then run it through your machine.

Repeat the process a few times to confirm all lime buildup is removed.

It's recommended to descale your machine every 3-6 months, depending on usage. Don't forget to rinse your machine thoroughly after descaling to remove any residue.

By incorporating regular descaling into your maintenance routine, you'll be able to enjoy perfect brews and extend the life of your espresso machine.

Backflushing for a Deeper Clean

After removing lime buildup through descaling, it's time to tackle the deeper grime and old coffee oils that can still be lurking inside your machine, which is where backflushing comes in.

Backflushing is a process that involves forcing pressurized hot water through your machine's brew circuit to remove any built-up residue and oils. This is especially important because old coffee oils can affect your machine's flavor profile, leading to bitter or unpleasant-tasting espresso.

By backflushing your machine regularly, you can prevent old coffee oils from building up and affecting your espresso's flavor profile.

You can remove any debris or sediment that may be clogging your machine's brew circuit.

You can improve your machine's overall performance and longevity.

You can reduce the risk of bacterial growth and contamination.

Group Head Maintenance 101

Your espresso machine's group head is a breeding ground for old coffee residue, mineral deposits, and bacteria, making regular cleaning and maintenance essential to prevent any buildup from affecting your shot quality.

Remove the portafilter and any attached accessories to give the area a good once-over. Use a soft cloth or brush to wipe away any visible debris, then mix a solution of equal parts water and white vinegar to soak the group head. Let it sit for about 30 minutes before rinsing thoroughly with warm water.

Check your group alignment to confirm it's properly aligned with the portafilter. Misalignment can lead to channeling and poor shot quality.

You should also perform a head leveling check to verify the group head is level with the machine's surface. This will help prevent any uneven distribution of coffee and water during brewing.

Steam Wand Care and Cleaning

Every day, you're likely using your steam wand to froth milk and create velvety textures, which means it's a prime candidate for clogging and mineral buildup.

To prevent this, regular cleaning of your steam wand is crucial. Start by purging the wand after each use to remove any remaining milk residue. Then, use a damp cloth to wipe down the wand, paying special attention to the Steam Tip, where milk can easily accumulate.

To deep clean your steam wand, follow these steps:

  1. Mix equal parts water and white vinegar in a cup.
  2. Place the cup under the steam wand and run steam through it for 30 seconds.
  3. Repeat step 2 several times to allow the vinegar solution to reach all areas of the wand.
  4. Use a Wand Polish to remove any mineral deposits or stubborn stains.

Boiler Maintenance and Safety

Maintaining your boiler is essential to prevent scale buildup, corrosion, and potentially hazardous situations.

You don't want your boiler to become a ticking time bomb, waiting to cause damage or injury.

To avoid this, you should perform regular boiler inspections to identify any potential issues before they become major problems.

Look for signs of wear and tear, such as rust, corrosion, or leaks.

You should also check the boiler's pressure gauge to verify it's within the recommended range.

It's also vital to obtain safety certification for your boiler, which confirms it meets the required safety standards.

This certification will give you peace of mind, knowing your boiler is safe to use.

Additionally, make sure to descale your boiler regularly to prevent mineral buildup, which can cause damage over time.

Pump and Motor Care Tips

Properly caring for your espresso machine's pump and motor is vital to maintain their smooth and efficient operation. These components are the heart of your machine, and neglecting them can lead to poor performance, increased energy consumption, and even complete breakdowns.

To keep your pump and motor in top condition, follow these essential tips:

  1. Check pump alignment: Verify the pump is properly aligned with the motor to prevent vibration and noise. Misalignment can lead to premature wear and tear.
  2. Perform motor lubrication: Regularly lubricate the motor bearings to reduce friction and heat buildup. This will help prolong the motor's lifespan and maintain its efficiency.
  3. Monitor pump pressure: Keep an eye on the pump pressure to prevent excessive wear on the motor and other components.
  4. Schedule regular cleaning: Clean the pump and motor regularly to prevent dust and debris buildup, which can cause overheating and damage.

Sealing and Gasket Inspection

As you inspect your espresso machine, don't overlook the seals and gaskets, which play a key role in maintaining the machine's overall performance and preventing costly repairs.

These small but essential components are prone to wear and tear, and neglecting them can lead to serious issues down the line.

Check the seals around the portafilter, group head, and steam wand for any signs of damage or deterioration. Look for cracks, brittleness, or softening, which can indicate seal damage.

When inspecting the gaskets, check for gasket wear, such as thinning or flattening, which can compromise the machine's ability to maintain pressure.

Make sure to clean the gaskets regularly to prevent buildup and corrosion. If you notice any damage or wear, replace the seals and gaskets promptly to prevent further damage.

Water Filter Replacement Guide

Replace your espresso machine's water filter every 3-6 months, depending on usage, to prevent scaling and bacterial buildup that can affect the taste of your espresso and the machine's longevity. Failing to do so can lead to a buildup of minerals, which can damage your machine's components and affect the flavor of your coffee.

When choosing a replacement filter, consider the following factors:

Filter Quality: Look for filters that are certified by reputable organizations, such as NSF International or the Water Quality Association.

Filter Cost: While it may be tempting to opt for a cheaper filter, keep in mind that high-quality filters may be more expensive upfront but can save you money in the long run by reducing maintenance costs.

Compatibility: Make sure the new filter is compatible with your espresso machine's make and model.

Replacement Schedule: Set a reminder to replace your filter every 3-6 months to ensure your espresso machine continues to function optimally.

Deep Cleaning and Descale Schedule

You'll want to deep clean and descale your espresso machine every 3-6 months to remove built-up residue and mineral deposits that can affect its performance and longevity.

This maintenance routine is essential to prevent any buildup from affecting the taste of your brew. To stay on top of this task, create a calculation calendar to determine the exact dates for deep cleaning and descaling.

For example, if you use your machine daily, you may need to descale every 3 months. If you use it less frequently, you can stretch it to 6 months.

Consider creating a seasonal schedule to coincide with your deep cleaning and descaling routine. For instance, you can schedule deep cleaning in the spring and fall, when you're more likely to be using your machine frequently.

This way, you'll confirm your machine is in top condition during peak usage periods. By incorporating this routine into your maintenance schedule, you'll be able to enjoy perfect brews every time, without worrying about the performance of your espresso machine.

Frequently Asked Questions

Can I Use Vinegar to Clean My Espresso Machine's Brew Head?

You can use vinegar to clean your espresso machine's brew head, but be cautious not to overdo it, as it can leave residue. Consider descaling every 3-6 months instead, and explore vinegar alternatives like citric acid or baking soda for a gentler clean.

How Often Should I Replace My Espresso Machine's Water Filter?

You should replace your espresso machine's water filter every 3-6 months, depending on usage, to maintain superior Filter Quality, as old filters can affect taste and increase Filter Cost in the long run.

Is It Necessary to Turn off My Espresso Machine When Not in Use?

When you're not sipping, it's like leaving the lights on in an empty room – a waste! Turning off your espresso machine when not in use saves power consumption and reduces safety risks, so don't be lazy, flip that switch!

Can I Put My Espresso Machine in the Dishwasher for Cleaning?

You shouldn't put your espresso machine in the dishwasher, as the high heat and harsh detergents can compromise dishwasher safety and reduce your machine's durability, leading to premature wear and tear.

Will Cleaning My Espresso Machine Affect Its Warranty?

You're wondering if cleaning your espresso machine will void the warranty, right? Typically, gentle cleaning won't affect warranty coverage, but always check with the manufacturer's support team to confirm, as they may have specific guidelines to follow.

Conclusion

You've made it to the end of this espresso machine maintenance marathon.

Congratulations! You're now a certified cleaning ninja, ready to tackle even the most stubborn stains.

And yet, despite all your hard work, your espresso machine will still break down on you one day.

It's just the universe's way of keeping you humble.

But hey, at least your brews will be perfect until then!

Keep your espresso machine in top shape by following these essential maintenance tips to prevent subpar brews and costly breakdowns.

You're just a few steps away from brewing the perfect iced coffee. Start by selecting the right coffee beans – Ethiopia or Kenya beans are great for iced coffee due to their bright, fruity notes. Next, decide on a brewing method: cold brew for a smooth, low-acidity taste or hot brew for a bolder flavor. The Japanese iced coffee technique and flash brew method offer unique flavor profiles too. Experiment with coffee-to-water ratios, grind sizes, and flavor combinations to find your ideal cup. Now, take the next step and discover the perfect ratio of flavor to refreshment.

Key Takeaways

  • Choose the right coffee beans, considering origin and roast level, to find the perfect flavor profile for iced coffee.
  • Experiment with cold brew methods, such as immersion or cold drip brewing, for a smooth and low-acidity coffee drink.
  • For a bolder flavor, use hot brew methods, like French press or pour-over, and chill the coffee in the refrigerator.
  • The Japanese iced coffee technique involves brewing hot coffee and then chilling it, offering a brighter and more vibrant flavor profile.
  • Flash brew method involves rapidly pouring hot water over ground coffee beans, resulting in a perfectly balanced flavor profile with notes of sweetness and acidity.

Choosing the Right Coffee Beans

Your coffee beans are the foundation of a great iced coffee, so selecting the right ones is essential.

You'll want to weigh two key factors: bean origin and roast level. When it comes to origin, you can opt for beans from regions like South America, Africa, or Asia. Each region offers unique flavor profiles, so it's worth experimenting to find the one you like best.

For iced coffee, you may want to lean towards beans from regions with bright, fruity notes, like Ethiopia or Kenya.

Roast level is another vital factor. Lighter roasts tend to be more acidic and fruity, while darker roasts are richer and more bitter.

For iced coffee, a medium to medium-dark roast is often a good starting point. This allows the coffee's natural flavors to shine through without becoming overpowered by the ice.

You can also experiment with single-origin beans versus blends to find the perfect balance of flavors.

Cold Brew Methods Explained

Cold brew methods offer a smooth, low-acidity alternative to traditional hot-brewed coffee, and you can explore two main approaches to achieve this.

The first method involves steeping coarse-ground coffee beans in cold water for an extended period, usually 12-24 hours. This process is often referred to as 'immersion brewing.' You'll need a large container, a fine-mesh strainer, and a Coffee Grinder to grind your beans to the right consistency. Grind them too fine, and you'll end up with a bitter taste.

The second approach is called 'Cold Drip Brewing,' where you'll need a specialized device to slowly drip water through the coffee grounds. This method allows for more control over the Steeping Times and can produce a more nuanced flavor.

Both methods require patience, but the result is well worth the wait. With cold brew, you can enjoy a revitalizing, low-acidity coffee drink that's perfect for hot summer days.

Experiment with different Steeping Times and coffee-to-water ratios to find your ideal flavor profile.

Japanese Iced Coffee Technique

You'll find another approach to brewing iced coffee in the Japanese Iced Coffee Technique, which offers a brighter, more vibrant flavor profile compared to cold brew methods.

This method involves slowly pouring hot water over ground coffee beans in a filter, which is then chilled and served over ice.

The result is a revitalizing Iced Delight with a more nuanced flavor profile than cold brew.

To try this technique, start by brewing a strong Coffee Concentrate using a pour-over or drip coffee maker.

Then, pour the concentrate over ice in a glass and add water to dilute it to your taste.

You can adjust the ratio of coffee to water to suit your preferences.

This method allows for a high degree of customization, making it perfect for those who like their iced coffee a certain way.

The Japanese Iced Coffee Technique is a great option for those who want a brighter, more invigorating iced coffee without sacrificing flavor.

By brewing hot and then chilling, you'll get a more balanced flavor profile than with cold brew methods.

Give it a try and experience the perfect Iced Delight!

Flash Brew for Perfect Balance

Its flash brew method involves rapidly pouring hot water over ground coffee beans, which results in a perfectly balanced flavor profile with notes of sweetness and acidity.

This technique allows you to achieve a smooth and refreshing iced coffee without sacrificing any of the flavors you love.

By using hot water, you're able to extract the optimal amount of flavor compounds from the coffee beans, which is essential for a well-balanced flavor profile.

When brewing with the flash method, it's essential to consider the following:

Brewing temperatures: Aim for a temperature between 195°F and 205°F to extract the perfect balance of flavors.

Coffee-to-water ratio: Experiment with different ratios to find your ideal balance, but a 1:4 ratio is a great starting point.

Grind size: Use a medium-coarse grind to ensure proper extraction and prevent any bitter flavors.

Brewing Hot Coffee for Icing

If flash brew isn't your thing, brewing hot coffee specifically for icing is another great way to create a delicious iced coffee.

You'll want to adjust your brewing technique to achieve the perfect coffee strength for icing. A stronger coffee is ideal, as it will hold its flavor when diluted with ice.

Aim for a brewing time of around 4-5 minutes to extract the maximum amount of flavor and oils from your coffee beans. You can use a French press, drip brewer, or pour-over to brew your hot coffee.

Just be sure to use a coarser grind and a slightly higher coffee-to-water ratio than you'd for a regular hot cup. This will guarantee your coffee is rich and full-bodied, making it perfect for icing.

Once brewed, let the coffee cool to room temperature before refrigerating it. This will help prevent any bitterness from developing and keep your iced coffee tasting smooth and revitalizing.

Essential Iced Coffee Ratios

Your ideal iced coffee ratio is essential to achieving the perfect balance of flavor and revitalization. It's the key to creating a rejuvenating drink that's not too weak or overpowering. The ratio of coffee to water is vital, and finding the right balance can be a matter of personal taste.

A general rule of thumb is to use 1 part coffee to 3 parts water. However, you can adjust this ratio to suit your taste preferences. If you prefer a stronger coffee, use less water. If you prefer a lighter flavor, use more water.

Experiment with different strength profiles to find the one that suits you best. A 1:3 ratio will give you a mild flavor, while a 1:1 ratio will result in a bolder, more intense flavor.

Don't be afraid to experiment with different ratios and strength profiles to find your perfect cup. Remember, the key to achieving the perfect iced coffee is to find a balance that you enjoy.

Flavorful Add-Ins and Mix-Ins

Now that you've nailed down your ideal iced coffee ratio, it's time to elevate the flavor with add-ins and mix-ins that tantalize your taste buds.

You can start by experimenting with Spiked Creamers, which can add a rich and velvety texture to your iced coffee. Try flavored creamers like vanilla, hazelnut, or caramel to give your coffee a unique twist. If you're feeling adventurous, you can even infuse your creamer with a splash of liqueur like Kahlúa or Baileys for a grown-up twist.

Next, get creative with Fancy Toppings to add a pop of color and flavor to your iced coffee. Whipped cream, chocolate shavings, and chopped nuts are all great options. You can also try more unexpected toppings like cinnamon, cocoa powder, or even edible flowers to create a unique flavor profile.

Don't be afraid to mix and match different add-ins and toppings to create a flavor combination that's all your own. With a little experimentation, you can turn your iced coffee into a delicious and Instagram-worthy treat.

Iced Coffee Recipes to Try

Take your iced coffee game to the next level with these invigorating recipes that'll quench your thirst and tantalize your taste buds. Whether you're looking for a revitalizing pick-me-up or a unique twist on a classic, these recipes are sure to satisfy your coffee cravings.

Three iced coffee recipes you should try:

  • Summer Sunrise: Combine iced coffee with pineapple juice, coconut milk, and a splash of grenadine for a sweet and tangy drink that screams Summer Vibes.
  • Coffee Colada: Blend iced coffee with pineapple juice, coconut cream, and a sprinkle of cinnamon for a creamy and indulgent Coffee Cocktail.
  • Mocha Chip Frappe: Blend iced coffee with chocolate syrup, milk, and crushed ice for a thick and creamy frappe that's perfect for hot summer days.

These recipes are just the starting point for your iced coffee adventures. Feel free to experiment with different flavors and ingredients to create your own unique recipes. With these recipes, you'll be well on your way to becoming an iced coffee connoisseur!

Frequently Asked Questions

Can I Use Decaf Coffee Beans for Iced Coffee?

You can definitely use decaf coffee beans for iced coffee, enjoying the decaf benefits while still savoring a rich flavor profile that's perfect for hot summer days, minus the caffeine kick.

How Do I Prevent Ice From Watering Down My Iced Coffee?

When you're worried about ice watering down your coffee, try using ice cubes made from strong brewed coffee instead of water – this way, you're not diluting the coffee strength as the ice melts.

Is It Necessary to Filter My Cold Brew Coffee?

Do you really want a gritty coffee experience? You don't need to filter your cold brew, but it's recommended to refine the flavor profile and avoid the unpleasant sediment texture that can ruin your invigorating drink.

Can I Make Iced Coffee With a Keurig or Single-Serve Machine?

You can definitely make iced coffee with a Keurig or single-serve machine using Machine Hacks like brewing a strong shot, then chilling it, or by using Coffee Pods specifically designed for iced coffee.

How Long Does Homemade Iced Coffee Stay Fresh in the Fridge?

Did you know 68% of Americans drink iced coffee daily? You'll want to savor yours for days to come! Homemade iced coffee stays fresh in the fridge for 3-5 days; keep it organized and prevent coffee spoilage by storing it in airtight containers.

Conclusion

You've mastered the art of brewing iced coffee, but don't get too comfortable – the world of iced coffee is vast and ever-changing.

On one hand, you've got the smooth, low-acidity cold brew, perfect for hot summer days.

On the other hand, the bright, snappy flavors of flash brew beckon.

The choice is yours, but one thing's for sure – with these techniques and recipes, you'll never be stuck in a coffee rut again.

The possibilities are endless, and your taste buds are waiting.

Brew the perfect cup of iced coffee with our expert techniques and recipes, and discover the refreshing flavor combinations that will quench your thirst.

You're one grind size away from brewing the perfect cup of coffee. For immersion brewing, go for a coarse grind, similar to kosher salt, for a rich and nuanced flavor. Drip and pour-over methods require a medium-coarse grind to prevent clogging or over-extraction. Espresso and stovetop demand a fine, almost powdery grind for high pressure and temperature. Cold brew and Turkish coffee benefit from a coarse grind, while Aeropress and Moka Pot need medium-fine to fine grinds. Experiment with different grind sizes to find the sweet spot for your brewing method and coffee beans, and discover the flavors waiting to be released in your cup.

Key Takeaways

  • Coarse grind size is ideal for immersion brewing to prevent over-extraction and bitter taste, allowing for a rich, full-bodied flavor.
  • Medium-coarse grind size is required for drip and pour-over brewing methods to achieve the perfect flow of water through the coffee.
  • A fine, almost powdery grind size is necessary for espresso and stovetop brewing to facilitate high pressure and temperature.
  • Coarse grind size is suitable for cold brew and Turkish coffee due to the slower extraction process, resulting in a smooth flavor profile.
  • Medium-fine to fine grind sizes are ideal for Aeropress and Moka Pot brewing, respectively, to guarantee optimal extraction and a smooth flavor profile.

Immersion Brewing Grind Sizes

When brewing with immersion methods, you'll typically want to use a coarse grind size, similar to kosher salt or slightly finer, to allow for the right balance of flavor and body. This grind size helps to prevent the coffee grounds from over-extracting, resulting in a bitter taste. With immersion brewing, the coffee grounds are in contact with the water for a longer period, so a coarser grind helps to prevent this.

The ideal flavor profiles for immersion brewing are often described as rich, full-bodied, and nuanced. To achieve this, you'll want to experiment with different grind sizes to find the sweet spot. For example, a slightly finer grind can bring out more delicate flavors, while a coarser grind can emphasize bold, darker notes.

Water temperatures also play a vital role in immersion brewing. Aim for temperatures between 195°F and 205°F to extract the perfect amount of flavor from your coffee. By combining the right grind size with the ideal water temperature, you'll be well on your way to brewing a delicious cup of coffee that suits your taste preferences.

Drip and Pour-Over Grinds

You'll need a distinctly different grind size for drip and pour-over brewing methods, which require a more precise balance of flavor and body. For these methods, you're aiming for a medium-coarse grind that allows for the perfect flow of water through the coffee.

If the grind is too fine, it'll clog the filter or lead to over-extraction, resulting in a bitter taste. On the other hand, a grind that's too coarse will lead to under-extraction and a weak coffee.

The ideal grind size for drip and pour-over brewing will produce a coffee texture that's smooth and balanced. You want to achieve a flavor profile that's nuanced, with notes of sweetness and acidity.

A medium-coarse grind will allow the coffee's natural flavors to shine through, without any bitter or sour notes. Experiment with different grind sizes to find the sweet spot for your particular brewing method and coffee beans.

Espresso and Stovetop Options

For espresso and stovetop brewing, a much finer grind is required to facilitate the high pressure and temperature involved in these methods can extract the maximum amount of flavor and oil from your coffee beans. You'll want to aim for a grind that's almost powdery, as this will guarantee the best possible extraction.

When it comes to espresso, you'll want to experiment with different roast levels to find the perfect balance for your taste buds. Lighter roasts will bring out more acidity and fruit notes, while darker roasts will add depth and richness.

Three tips to keep in mind when selecting beans for espresso and stovetop brewing:

  1. Choose high-quality beans: Fresh, specialty-grade beans will result in a more complex and nuanced flavor profile.
  2. Consider your roast level: Lighter roasts are perfect for espresso, while medium to dark roasts work well for stovetop brewing.
  3. Experiment with bean selection: Try different origins, blends, and single-origin beans to find the perfect flavor for your taste buds.

Cold Brew and Turkish Coffee

Cold brew and Turkish coffee require a much coarser grind than espresso and stovetop methods, as the slower extraction process demands a more rugged texture to achieve perfect flavor.

When brewing cold brew, you're looking for a grind that's similar to kosher salt. This coarse grind allows for a smooth, low-acidity flavor profile that's perfect for hot summer days.

For Turkish coffee, you'll want an even coarser grind, similar to sea salt. This fine-tuned grind size facilitates the delicate flavors and oils from the coffee beans are extracted perfectly, resulting in a rich and intense cup.

The bean origin also plays a significant role in the flavor profile of your cold brew and Turkish coffee. If you're using beans from a single origin, you'll notice a more distinct flavor profile. However, if you're using a blend, the flavors will be more balanced.

Aeropress and Moka Pot Grinds

Moving from the coarse grinds of cold brew and Turkish coffee, you're now working with finer textures when brewing with an Aeropress or Moka Pot. These brewing methods require a more nuanced approach to grind size, as the right texture can make all the difference in the flavor profiles you're trying to achieve.

When it comes to Aeropress, you'll want to aim for a medium-fine grind, similar to kosher salt. This will allow for the right amount of extraction and a smooth, full-bodied flavor. For Moka Pot, a fine grind, similar to table salt, is best. This will facilitate the water flowing through the coffee grounds quickly and evenly, resulting in a rich and intense flavor.

Optimal extraction: The right grind size guarantees the perfect balance of flavors in your cup.

Smooth flavor profiles: Avoid bitter or under-extracted flavors by using the right grind size for your brewing method.

Increased control: By experimenting with different grind sizes, you can customize the flavor to your liking and develop a deeper appreciation for the coffee-making process.

Frequently Asked Questions

Can I Use a Food Processor to Grind My Coffee Beans?

You can try using a food processor to grind your coffee beans, but be aware that it might not produce the ideal coffee texture and has limitations regarding even grinding and potential heat generation.

Do Grind Sizes Vary Between Light and Dark Roasted Coffee?

You'll be surprised to know that 70% of coffee's flavor comes from the roast level! When it comes to grind sizes, you'll find that darker roasts require a coarser grind to bring out their bold flavor profile, while lighter roasts need a finer grind for a brighter taste.

How Often Should I Clean My Coffee Grinder to Prevent Oil Buildup?

You should clean your coffee grinder every 1-2 weeks to prevent oil accumulation, as residual oils from beans can affect flavor and clog the grinder; regular grinder maintenance is key to peak performance.

Can I Store Ground Coffee in an Airtight Container for Later Use?

You can store ground coffee in an airtight container, but it's essential to choose a container made of non-porous materials like glass or ceramic to preserve freshness.

Will a Blade Grinder Produce the Same Results as a Burr Grinder?

You'll notice a difference between blade and burr grinders; blade grinders generate heat, damaging beans, and lack durability, while burr grinders produce a consistent grind without heat generation, ensuring a better-tasting cup.

Conclusion

You've navigated the grind size spectrum like a pro!

From immersion to espresso, you now know the perfect grind for each brew.

Remember, it's all about harmony – the right grind, the right beans, and the right brew method.

As the ancient Greeks would say, 'The whole is more than the sum of its parts.'

Now, go forth and brew like a master, and may your cups always be full of flavor and joy!

Bringing out the best flavor in your coffee depends on using the optimal grind size for your specific brewing method.

You're deciding between French press and pour-over coffee, two brewing methods that yield distinct flavors and textures. French press gives you a rich, bold coffee with a heavier body, while pour-over offers bright notes and balanced acidity with a cleaner taste. Think about what you crave in your daily brew: do you want a slow, ritual-like experience with a fuller flavor, or a more delicate, customizable cup? Considering your lifestyle, coffee grind preferences, and equipment goals will help you choose the perfect method for you – and exploring these factors will reveal the ideal fit for your coffee dreams.

Key Takeaways

  • French press yields a bold, rich flavor with deeper notes and a heavier body, ideal for those who like strong coffee.
  • Pour-over coffee is known for its bright notes and balanced acidity, perfect for those who prefer a cleaner, more refined taste.
  • French press requires minimal effort and is easy to clean, making it a great option for busy mornings.
  • Pour-over coffee makers require more attention to detail and can be more time-consuming, but offer a high degree of control and customization.
  • The grind size is crucial, with French press requiring a coarse grind and pour-over needing a medium to fine grind for optimal flavor extraction.

The French Press Method

You start by adding coarsely ground coffee beans to the French press, which allows the coffee's natural oils and flavors to seep into the water.

As you pour hot water over the grounds, the aroma of freshly brewed coffee fills the air, enticing you to take that first sip.

For a richer flavor, try using a French Roast, which pairs perfectly with the immersion brewing method of the French press.

As you wait for the coffee to steep, you can't help but feel a sense of ritual surrounding this daily routine.

The French press method is all about slowing down and savoring the experience, making it a true coffee ritual.

Once the steeping time is up, press the plunger down, and pour the coffee into your cup.

The result is a bold, full-bodied coffee that's full of flavor and texture.

With the French press, you're in control of every step of the brewing process, allowing you to tailor the coffee to your taste preferences.

Pour Over Coffee Basics

Pouring hot water over ground coffee beans in a filter is the foundation of pour-over coffee, a method that allows for a high degree of control and customization. You're in charge of every step, from the coarseness of the grind to the flow rate of the water. This level of precision is what makes pour-over coffee so appealing to coffee enthusiasts.

As you explore the world of pour-over coffee, you'll develop your own coffee rituals and brewing techniques. You might find that you prefer a slower, more deliberate pour, or that you like to experiment with different coffee-to-water ratios. The beauty of pour-over is that there's no one 'right' way to do it – it's all about finding what works best for you.

Some things to keep in mind as you get started:

The type of filter you use: Paper, metal, or cloth – each has its own unique characteristics and flavor profiles.

The temperature of your water: Between 195°F and 205°F is ideal for peak extraction.

The ratio of coffee to water: Experiment with different ratios to find your perfect balance.

Flavor Profile Comparison

Between French press and pour-over, the flavor profiles couldn't be more distinct, with one yielding a richer, more full-bodied taste and the other a cleaner, more nuanced cup.

When you opt for French press, you can expect a bold, rich flavor with deeper notes and a heavier body. The immersion brewing method allows the coffee grounds to steep in the water, which extracts more oils and sediment, resulting in a more robust taste.

On the other hand, pour-over coffee is known for its bright notes and balanced acidity. The manual brewing process allows for a more delicate extraction, which brings out the subtle flavors and aromas of the coffee beans.

You'll notice a cleaner, more refined taste with a lighter body. The pour-over method is ideal for coffee connoisseurs who appreciate the nuances of specialty coffee.

Ease of Use and Maintenance

French press coffee makers require minimal effort to operate, as the process involves simply adding coffee grounds and water to the container and then pressing the plunger.

You'll find that incorporating a French press into your daily routine is a breeze, as it doesn't require any special skills or complicated steps. Plus, the cleaning process is a cinch, as the container and plunger are easy to wash and dry.

In contrast, pour-over coffee makers can be a bit more high-maintenance. You'll need to carefully measure out the coffee and water, and slowly pour the water over the grounds.

This process can be a bit more time-consuming and requires more attention to detail.

A few key benefits are worth weighing when it comes to ease of use and maintenance:

  • French presses are great for travel convenience, as they're lightweight and easy to pack.
  • Pour-overs can be more finicky, but offer a more customizable brewing experience.
  • Both methods allow for a hassle-free cleaning process, making them easy to incorporate into your daily routine.

Coffee Grind Requirements

When it comes to coffee grind requirements, you'll find that the ideal grind size varies substantially depending on the brewing method.

For French press, you'll want a coarse grind to prevent the coffee grounds from passing through the press, resulting in a gritty brew. On the other hand, pour-over requires a medium to fine grind, allowing for an even extraction of flavors.

Grind consistency is vital for both methods. You'll want to aim for a uniform grind size to prevent under or over-extraction.

To achieve this, investing in a high-quality burr grinder is essential. Blade grinders can generate heat, damaging the beans and resulting in an inconsistent grind. Burr quality plays a significant role in determining the flavor of your coffee.

With a burr grinder, you can adjust the grind size to suit your brewing method. For French press, a burr grinder with a coarse setting will give you the perfect grind. For pour-over, a medium to fine setting will guarantee an even extraction.

Equipment and Cost Comparison

You'll need to weigh the equipment and cost involved in each brewing method, as the investment can add up quickly.

When it comes to French press, you'll need a coffee grinder, a French press coffee maker, and a coffee scoop. These items can take up significant space in your kitchen, so consider the space efficiency of your brewing method.

On the other hand, pour-over brewing requires a coffee grinder, a pour-over dripper, and a coffee kettle. These items are generally more compact and won't take up as much space.

French press coffee makers can range from $20 to $100 or more, depending on the brand and quality. Pour-over drippers can range from $10 to $50 or more, depending on the material and brand. Coffee grinders can range from $10 to $100 or more, depending on the type and quality.

If you're on a tight budget, pour-over brewing might be the more affordable option. However, if you're willing to invest in high-quality equipment, French press brewing can be a more cost-effective choice in the long run. Consider your budget constraints and space efficiency needs when making your decision.

Your Lifestyle and Preferences

Your daily routine and personal taste preferences play a significant role in determining which brewing method is best suited for you.

If you're a busy bee who's always on-the-go, a French press might be the way to go. It's quick, easy, and can be ready in as little as four minutes. You can simply add coffee grounds, pour in hot water, and press – voilà! You've got a rich, bold cup of coffee to start your day.

On the other hand, if you're someone who savors their morning routines and enjoys a more meditative brewing experience, pour-over might be the perfect fit. It requires a bit more time and effort, but the reward is a clean, nuanced cup of coffee that's tailored to your taste preferences.

Consider your daily habits: do you have a few extra minutes in the morning to dedicate to brewing, or do you need a quick coffee fix to get going? Your answer will likely point you in the direction of the brewing method that's right for you.

Frequently Asked Questions

Can I Use French Press for Tea or Other Non-Coffee Beverages?

You can definitely use a French press for tea or other non-coffee beverages, enjoying tea infusions like chamomile or herbal delights like peppermint, and even experimenting with fruity blends for a revitalizing twist.

Is Pour Over Coffee Suitable for Large Groups or Parties?

When hosting a large party, you'll want to think about batch brewing methods for efficient coffee production. Pour-over coffee isn't ideal for big groups, but you can opt for a pour-over-inspired batch brewer to streamline your party planning.

Can I Store Coffee Beans in the Same Container as Ground Coffee?

Don't be a coffee criminal – separate your beans and grounds to preserve Coffee Freshness! You're better off storing coffee beans in an airtight container, away from ground coffee, to maintain ideal Bean Storage and flavor.

Are There Any Health Benefits to Choosing One Method Over the Other?

You're wondering if your brewing method affects your health? Well, you'll retain more antioxidants with French Press, but Pour Over's lower caffeine absorption might suit you better if you're sensitive to caffeine's effects.

Can I Travel With French Press or Pour Over Equipment Easily?

When you're on-the-go, you're wondering if you can travel with your coffee gear easily. You'll be happy to know you can! Look for packing strategies like compact designs and travel accessories like silicone sleeves to make traveling with your French press or pour-over a breeze.

Conclusion

You've weighed the pros and cons, and now it's time to decide: French press or pour over?

As you stand in your modern kitchen, surrounded by sleek appliances, you're about to make a choice that'll transport you back to a bygone era.

Will you be a 19th-century Parisian, savoring the rich, bold flavors of French press, or a 1960s hipster, reveling in the nuanced, laid-back vibes of pour over?

The clock is ticking – which coffee soulmate will you choose?

Selecting the perfect brewing method depends on your taste preferences, lifestyle, and equipment goals, but which one will reign supreme in your daily ritual?

You're now part of a growing movement that's revolutionizing the way people enjoy their daily cup of coffee, with single-serve coffee makers offering a perfect blend of convenience, quality, and customization. These machines cater to your individual tastes and preferences, brewing a freshly made cup in under a minute. You can choose from a variety of flavors and strengths, and even experiment with different roast levels and acidity. With advanced technology and eco-friendly designs, you can enjoy your perfect cup while doing your part for the planet. And that's just the beginning – discover how single-serve coffee makers can elevate your coffee experience even further.

Key Takeaways

  • Single-serve coffee makers offer convenience and speed, brewing a freshly brewed cup in under a minute, perfect for busy lives.
  • These machines cater to individual tastes and preferences, providing a variety of flavors, brew strengths, and cup sizes to suit every palate.
  • Advanced technology, such as Smart Sensors and Precision Engineering, ensures consistently excellent cups with complex flavor profiles tailored to user preferences.
  • Compact designs and hidden storage compartments keep kitchens organized, while removable parts make descaling and cleaning easy, maintaining optimal performance.
  • Single-serve coffee makers are cost-effective, allowing users to brew only what they need, reduce waste, and save money in the long run.

The Rise of Single-Serve Machines

Since the early 2000s, single-serve coffee makers have been steadily gaining popularity in American kitchens.

As you consider joining the ranks of single-serve enthusiasts, you should understand the market trends that have driven this growth. You've likely noticed that more and more people are opting for single-serve machines, and it's not just about the convenience. These machines have become a staple in many homes due to their ability to cater to individual tastes and preferences.

As the demand for single-serve coffee makers continues to rise, you might wonder about the environmental impact of these machines.

While it's true that single-serve machines use more resources than traditional coffee makers, many manufacturers are now focusing on sustainable practices. You'll find that many modern single-serve machines are designed with eco-friendliness in mind, using recyclable materials and minimizing waste.

As you explore the world of single-serve coffee makers, be sure to look for brands that prioritize the environment. By choosing an eco-friendly option, you can enjoy your daily cup of coffee while also doing your part for the planet.

Speed and Convenience Unleashed

With the touch of a button, you can have a freshly brewed cup of coffee in your hands in under a minute, thanks to the incredible speed and convenience of single-serve machines.

This level of speed is a game-changer for those who lead busy lives, especially during the morning rush. No longer do you need to sacrifice precious time to get your morning coffee fix.

Instead, you can quickly grab a cup and go, without compromising on quality.

Single-serve machines are perfect for coffee on the go. Whether you're heading to work, school, or just need a quick pick-me-up, these machines have got you covered.

You can choose from a variety of flavors and blends, and even adjust the strength to your liking.

The best part? You don't need to worry about wasting coffee or cleaning up a messy pot.

With single-serve machines, you can have your coffee exactly how you want it, whenever you want it.

It's the ultimate in convenience and speed, making your daily coffee routine a whole lot easier.

Customization for Every Palate

You can tailor your coffee experience to your unique taste preferences with single-serve machines, which offer an impressive range of flavors, brew strengths, and cup sizes to cater to every palate.

Whether you're a fan of strong and bold or smooth and subtle, single-serve coffee makers have got you covered. With Coffee Profiles, you can experiment with different roast levels, acidity, and body types to find your perfect cup. Flavor Wheels, a visual representation of coffee flavors, also help you navigate the vast world of coffee and identify the notes that resonate with your taste buds.

You can choose from a variety of flavors, from classic coffee blends to exotic and fruity flavors.

Want a stronger brew? No problem! Single-serve machines often come with adjustable brew strength settings.

And, if you're sharing with friends or family, you can easily switch between different cup sizes to suit everyone's needs.

With single-serve coffee makers, you're not limited to one type of coffee; you can explore and enjoy a new flavor every day. The possibilities are endless, and the best part? You're in complete control of your coffee experience.

Advanced Technology at Work

As you explore the world of single-serve coffee makers, you'll discover that advanced technology is working behind the scenes to guarantee your perfect cup, every time. These machines are equipped with Smart Sensors that detect the type of coffee pod you're using and adjust the brewing parameters accordingly. This certifies that your coffee is always brewed to the ideal temperature, water pressure, and coffee-to-water ratio.

Precision Engineering is also at play, allowing for a level of accuracy that's unmatched in traditional coffee makers. The machines' internal components are designed to work in harmony, guaranteeing that every cup is consistently excellent. This attention to detail means that you can enjoy a perfect cup of coffee, every time, without having to lift a finger.

With advanced technology working for you, you can focus on what really matters – enjoying your coffee. Whether you're in a hurry or want to savor every sip, single-serve coffee makers have got you covered. So go ahead, explore the world of single-serve coffee makers, and experience the convenience and quality that advanced technology has to offer.

Rich Flavors and Aromas Guaranteed

Single-serve coffee makers extract every last drop of flavor from your favorite coffee pods, guaranteeing a rich, velvety cup that's bursting with aromatic goodness.

With each brew, you'll experience a complex flavor profile that's tailored to your taste preferences. Whether you prefer a bright, citrusy note or a deep, smoky undertone, single-serve coffee makers deliver.

The secret lies in the precision brewing technology, which certifies that every cup is infused with the perfect balance of flavor and aroma. As you sip, you'll notice distinct aroma layers emerging, from the initial burst of freshness to the lingering finish.

The result is a truly immersive coffee experience that will leave you wanting more.

You'll appreciate the ability to explore different flavor profiles, from classic espresso roasts to exotic, small-batch blends. With single-serve coffee makers, you can indulge in a new flavor adventure every day, without compromising on quality or convenience.

Space-Saving Design Solutions

By incorporating sleek, compact designs, these coffee makers fit seamlessly into your kitchen, freeing up valuable counter space for other essentials.

You'll appreciate the compact footprint of these single-serve coffee makers, which allows them to sit comfortably on your countertop without overwhelming the space. With a smaller footprint, you can easily place them in a corner or against a wall, keeping your kitchen organized and clutter-free.

Many of these coffee makers also feature hidden storage compartments, perfect for stashing away coffee pods, cups, or other accessories.

This thoughtful design element keeps your kitchen countertops clear of clutter and helps to maintain that everything you need is within easy reach. With a single-serve coffee maker, you can enjoy a high-quality cup of coffee without sacrificing valuable space in your kitchen.

Whether you live in a small apartment or have a large kitchen, these space-saving design solutions make it easy to incorporate a coffee maker into your daily routine. By choosing a single-serve coffee maker, you're not only getting a great cup of coffee, but also a more organized and functional kitchen.

Cost-Effective Coffee Options

With a single-serve coffee maker, you're in control of your coffee expenses, brewing only what you need and reducing waste to save you money in the long run.

This control allows you to make budget calculations that fit your lifestyle. You can calculate the cost of each cup and adjust your coffee habits accordingly.

For instance, if you drink two cups a day, you can set a budget of $1 per cup and choose a coffee subscription that fits within that range.

This way, you can enjoy high-quality coffee without breaking the bank.

With coffee subscriptions, you can explore different flavors and roasts without committing to a large purchase.

You can try a new coffee every month or stick to your favorite blend.

The flexibility is yours, and the cost is predictable.

Plus, many coffee subscription services offer discounts for long-term commitments, which can further reduce your coffee expenses.

Maintenance Made Easy

You'll appreciate how easy it's to descale and clean your single-serve coffee maker, as most models feature removable parts and dishwasher-safe components.

This means you can simply toss the used parts in the dishwasher, and they'll come out sparkling clean. No more scrubbing away at stubborn stains or worrying about bacterial buildup.

To maintain your coffee maker's optimal performance, create a cleaning schedule that works for you.

Set reminders to descale your machine every 3-6 months, depending on your usage and water quality. This will prevent lime scale buildup and keep your coffee tasting fresh.

Many single-serve coffee makers also come with descale reminders, so you'll never forget when it's time to give your machine some TLC.

Additionally, look for models with built-in cleaning modes that can run a cleaning cycle with the touch of a button.

With these features, you'll be able to enjoy a perfectly brewed cup of coffee every time, without the hassle of tedious maintenance.

Frequently Asked Questions

Can Single-Serve Coffee Makers Be Used With Reusable Filters?

You're wondering if single-serve coffee makers can be used with reusable filters? Yes, you can! Opt for eco-friendly alternatives like metal or cloth filters, offering cost-effective solutions that reduce waste and save you money in the long run.

Are Single-Serve Coffee Makers Compatible With All Coffee Pod Brands?

You'll find that some single-serve coffee makers are brand-exclusive, limiting your pod variety, while others are more open, accepting multiple brands and offering a wider range of flavors and blends to explore.

How Do I Descale My Single-Serve Coffee Maker Regularly?

You should descale your single-serve coffee maker every 3-6 months to prevent water mineral buildup, which can affect taste and machine performance; check your user manual for specific descaling frequency recommendations.

Can I Use Tap Water in My Single-Serve Coffee Maker Safely?

"When in Rome, do as the Romans do" – but when it comes to your coffee maker, don't use tap water without checking its quality, as it may lead to mineral buildup, affecting your brew's taste and machine's longevity.

Do Single-Serve Coffee Makers Have a Built-In Grinder Option?

You're wondering if your single-serve coffee maker has a built-in grinder option, right? Unfortunately, most models don't, but you can still enjoy fresh grinds by grinding your favorite bean options separately before brewing.

Conclusion

As you savor the perfect cup, it's clear that single-serve coffee makers have hit the sweet spot.

They've taken the coffee world by storm, and it's no wonder why – they're the best of both worlds.

You get to have your cake and eat it too, enjoying convenience, customization, and quality all in one.

With these machines, every day is a fresh brew, and you're the master of your coffee destiny.

Find your perfect cup with single-serve coffee makers, offering unparalleled convenience, customization, and quality in every brew.

You're on a mission to brew the perfect cup of coffee with your trusty percolator! Start by selecting high-quality, freshly roasted coffee beans that suit your taste preferences. Grind them just right – medium-coarse is perfect for percolation. Use the ideal coffee-to-water ratio of one tablespoon per six ounces of water, and heat the water to between 195°F and 205°F. Remove the percolator from the heat source when it starts to boil, then let it cool for 30 seconds to a minute. Now you're on the path to a rich, full-bodied flavor – and there's more to discover to take your coffee game to the next level.

Key Takeaways

  • Use high-quality, freshly roasted coffee beans that suit your taste preferences for the best flavor.
  • Grind the beans immediately before brewing to a medium-coarse grind for perfect extraction during percolation.
  • Use the ideal coffee-to-water ratio of one tablespoon of coffee for every six ounces of water, adjusting to suit your taste preferences.
  • Heat water to the ideal temperature of between 195°F and 205°F for perfect extraction, and monitor the temperature closely to avoid overheating.
  • Experiment with brewing times, coffee-to-water ratios, and roast levels to find the perfect balance and create a unique flavor profile.

Choosing the Right Coffee Beans

You'll want to select a high-quality coffee bean that suits your taste preferences, as it's the foundation of a great percolated cup.

When choosing the right coffee beans, think about the coffee regions that appeal to you. Do you prefer the bright acidity of African beans or the rich, smooth flavor of South American beans? Perhaps you're a fan of the balanced, nuanced taste of Asian beans.

Whatever your preference, make sure you're getting beans from a reputable source that sources high-quality beans from top coffee regions.

Another vital factor is bean freshness. Freshly roasted and ground coffee is essential for a great percolated cup.

Look for beans that have been roasted within the past week or two to achieve peak flavor. Avoid beans that have been sitting on a shelf for months, as they can become stale and lose their flavor.

Grinding Your Coffee Just Right

With your fresh, high-quality coffee beans in hand, it's time to grind them just right for percolation. Freshness matters, and grinding your beans immediately before brewing guarantees the best flavor. You'll want to aim for a medium-coarse grind, as this will allow for the perfect extraction during percolation.

When it comes to grinders, you've got two main options: blade or burr. Burr styles are the way to go, as they produce a more consistent grind and don't generate heat, which can damage your beans. You can choose between a flat burr or conical burr grinder, but conical is generally considered better for percolation.

Grind your beans in small batches to maintain freshness, and store any leftovers in an airtight container. Avoid grinding too much coffee at once, as this can lead to staleness. With your freshly ground coffee, you're one step closer to brewing a delicious percolated cup.

Measuring Coffee and Water

Now that you've got your freshly ground coffee, it's time to measure it out correctly to achieve the perfect balance of flavors.

The key is to find the ideal coffee-to-water ratio. A general rule of thumb is to use one tablespoon of coffee for every six ounces of water. However, you can adjust this ratio to suit your taste preferences. If you prefer a stronger brew, use more coffee. If you like it weaker, use less.

But it's not just about the coffee – the quality of your water matters too. Use fresh, filtered water to prevent any impurities or minerals from affecting the taste of your coffee. Avoid using tap water with high levels of chlorine or other chemicals, as these can react with the coffee and create unpleasant flavors.

Experiment with different coffee ratios and water qualities to find the perfect combination for your taste buds. Remember, the right balance is vital to bringing out the full flavor of your coffee. By measuring your coffee and water correctly, you'll be well on your way to brewing a delicious cup of coffee with your percolator.

Heating Water to the Right Temperature

Getting the water to the ideal temperature is essential, as it directly affects the extraction of your coffee's flavors and oils. You're aiming for a temperature between 195°F and 205°F, which allows for perfect extraction.

To achieve this, you'll need to use thermal control. You can do this by using a thermometer to monitor the water's temperature. If you don't have a thermometer, you can remove the percolator from the heat source when it starts to boil, then let it cool for about 30 seconds to a minute.

It's also vital to use purified water, as impurities can affect the taste of your coffee. You can use a water filter or purification tablets to make certain your water is clean and free of contaminants.

Once you've got your purified water, fill the percolator and place it on the heat source. As the water heats up, make sure to monitor the temperature closely to avoid overheating. By controlling the temperature and using purified water, you'll be well on your way to brewing a flawless cup of coffee.

Adding Coffee Grounds to the Percolator

Your percolator's water is hot and ready, so it's time to add the star of the show: your coffee grounds. This is a vital step in making great coffee with a percolator, as the type and amount of coffee you use can greatly impact the final flavor.

Use one tablespoon of coffee for every six ounces of water. You can adjust this ratio to your taste, but this is a good starting point.

Make sure the coffee grounds are evenly distributed in the percolator's basket. This allows all the grounds to come into contact with the hot water, resulting in a more balanced flavor.

Use a medium to dark roast coffee for a richer flavor.

Freshly grind your coffee beans just before brewing for the best flavor.

Monitoring the Brewing Process

As the percolator starts to cycle, watch for the coffee to begin flowing into the pot, signaling that the brewing process has kicked off.

This is your cue to monitor the brew time, which typically ranges from 5 to 10 minutes, depending on your desired strength and flavor.

Keep an eye on the percolator's progress, as the coffee will start to cycle through the system, bubbling up and then settling back down.

Pay attention to visual cues, such as the sound of the percolator's gurgling and the aroma of freshly brewed coffee wafting through the air.

As the brew time progresses, you'll notice the coffee's color and consistency changing. The liquid will start to darken, and the flavors will begin to meld together.

By monitoring the brewing process, you'll be able to gauge when your coffee has reached the perfect balance of flavors and strength.

Avoiding Over-Extraction Pitfalls

To prevent over-extraction, which can lead to bitter flavors and a ruined brew, you must carefully control the brew time and coffee-to-water ratio. Achieving coffee balance is vital, and it's easy to get it wrong. If you're not mindful of extraction timing, you'll end up with a brew that's too strong or too weak.

Use a timer: Set a timer to prevent brewing for too long. The ideal brew time is between 5-7 minutes.

Monitor the coffee-to-water ratio: Make sure you're using the right amount of coffee for the amount of water you're using. A good rule of thumb is 1 tablespoon of coffee for every 6 ounces of water.

Watch for signs of over-extraction: If your coffee is brewing too slowly or you notice it's getting darker than usual, it may be a sign that you need to adjust your brew time or coffee-to-water ratio.

Experiment and adjust: Don't be afraid to try different brew times and coffee-to-water ratios to find the perfect balance for your taste preferences.

Perfecting Your Percolator's Cycle

Now that you've mastered the art of avoiding over-extraction, it's time to focus on perfecting your percolator's cycle to achieve a consistently great brew.

Cycle timing is vital, as it directly affects the flavor and quality of your coffee. Aim for a cycle that lasts between 5-7 minutes, depending on your percolator's strength and the coarseness of your grind.

During this time, pay attention to the percolation patterns. You want to see a steady, gentle flow of coffee dripping into the pot. If the flow is too fast or too slow, adjust the heat or grind accordingly.

A good percolation pattern will facilitate that all the flavors are evenly extracted from the coffee grounds.

As you perfect your cycle, you'll notice that the coffee starts to brew at a consistent strength and flavor. Experiment with different cycle timings and percolation patterns to find the sweet spot that works best for you.

With a little practice, you'll be brewing coffee like a pro and enjoying a perfect cup every time.

Serving and Enjoying Your Coffee

Pour your freshly brewed coffee into your favorite mug, savoring the aroma that fills the air. You've finally reached the best part – enjoying the fruits of your labor! As you take your first sip, remember that serving and enjoying your coffee is just as important as brewing it.

Developing your own coffee rituals can elevate your coffee experience.

Create a cozy atmosphere: Dim the lights, light some candles, and get comfortable.

Pair your coffee with a treat: Muffins, cookies, or even a slice of pizza can complement your coffee perfectly.

Take your time: Savor each sip, and don't rush through your coffee.

Make it a social activity: Invite friends over, or enjoy a quiet moment with a loved one.

As you explore different coffee pairings, you'll discover new flavors and textures that enhance your coffee experience. Whether you're a sweet-tooth or a savory fan, there's a perfect pairing out there for you.

Experimenting With Flavor Profiles

You're about to discover a world of flavors by experimenting with different coffee-to-water ratios, brewing times, and roasts to find your perfect flavor profile.

The beauty of percolator coffee lies in its versatility, and with a little trial and error, you can tap into a wide range of flavor notes.

Start by adjusting the coffee-to-water ratio to suit your taste buds. A stronger ratio will bring out bold, rich flavors, while a weaker ratio will result in a smoother, more subtle taste.

Next, experiment with brewing times to find the perfect balance. Shorter brewing times will preserve the coffee's natural acidity, while longer times will bring out deeper, more caramel-like flavors.

Roast levels also play a significant role in shaping your flavor profile. Lighter roasts will yield bright, fruity notes, while darker roasts will introduce smoky, chocolatey undertones.

Don't be afraid to mix and match different roast levels, brewing times, and ratios to create a flavor profile that's uniquely yours. With a little patience and practice, you'll be sipping on your perfect cup of coffee in no time.

Frequently Asked Questions

Can I Use a Percolator to Make Iced Coffee?

You can definitely use a percolator to make iced coffee, but you'll end up with a bitter flavor profile. For a smoother taste, consider a cold brew method, which is specifically designed for iced coffee and yields a richer flavor.

How Do I Clean My Percolator to Prevent Old Flavors?

You're smart to prioritize cleaning your percolator! For daily maintenance, descale every 3-6 months and wash with soap and warm water. This guarantees a fresh taste in every brew, free from old flavors and residue.

Are Percolators Safe to Use With a Timer or Scheduling Device?

You're likely among the 68% of Americans who love their morning coffee. When using a timer or scheduling device with your percolator, make certain it has an Automatic Shut off feature to prevent overheating, and be aware of Battery Risks to avoid electrical issues.

Can I Use a Paper Filter in a Percolator for Cleaner Coffee?

You're wondering if using a paper filter in a percolator will give you cleaner coffee. Yes, it can! A high-quality filter will absorb impurities, resulting in a smoother flavor profile and less bitterness, perfect for your daily brew.

Do Percolators Work Well With Decaf or Half-Caf Coffee Blends?

You'll find that percolators work surprisingly well with decaf or half-caf coffee blends, as they don't mask the decaf nuances, and you can still appreciate the flavor profiles, which might be more delicate than their caffeinated counterparts.

Conclusion

Savoring the symphony of succulent sips, you've successfully crafted a cup of coffee that's truly sublime.

By fine-tuning your percolator's performance, you've accessed a flavor profile that's fantastically full-bodied.

Remember, precision is key: perfect your grind, measure with care, and heat with finesse.

With each delicious dripping, your percolator's potential is palpable.

Now, go forth and relish the rich rewards of your labor, reveling in every remarkable roast.

Unlock the secrets to brewing the perfect cup of coffee with a percolator and discover the nuances that will elevate your morning ritual.