When your coffee grinder malfunctions, start by checking the power source – is it plugged in and working correctly? If it's clogged, clean the hopper and grinder, and adjust the grind setting to improve bean flow. If the grind quality is off, experiment with different roasts or brands, and verify the burrs are clean. For blade issues, regularly clean them to prevent buildup, and consider investing in a high-quality grinder. Take breaks to let the motor cool down, and keep the grinder clean to prevent overheating. By following these steps, you'll be well on your way to identifying and fixing the problem, and there's more to discover to get your daily brew back on track.
Key Takeaways
- Check for power issues by inspecting the cord, outlet, and circuit breaker, and consult the user manual for specific guidance.
- Clean the grinder and hopper regularly to prevent clogging and blockages, and adjust the grind setting to improve bean flow.
- Verify that burrs are clean and free of debris, and adjust the grinder settings to achieve a uniform grind distribution pattern.
- Regularly clean the blades to prevent buildup and jamming, and consider investing in a high-quality grinder with durable blades.
- Perform preventative maintenance by cleaning the vents, fans, and interior/exterior of the grinder to ensure proper thermal management and motor protection.
Grinder Not Turning On
When you plug in your coffee grinder and flip the switch, but it refuses to spring to life, it's frustrating and puzzling.
Before you start blaming the grinder, take a step back and troubleshoot the issue.
One possible culprit could be a power surge that tripped the internal circuit breaker. Check if the grinder has a reset button; if it does, press it to see if it starts working again.
If not, it's time to investigate the outlet. A faulty outlet can prevent your grinder from turning on. Try plugging the grinder into a different outlet to rule out any issues with the electrical supply.
If the grinder still doesn't turn on, you might need to check the cord for any signs of damage or wear. A faulty cord can also prevent the grinder from receiving power.
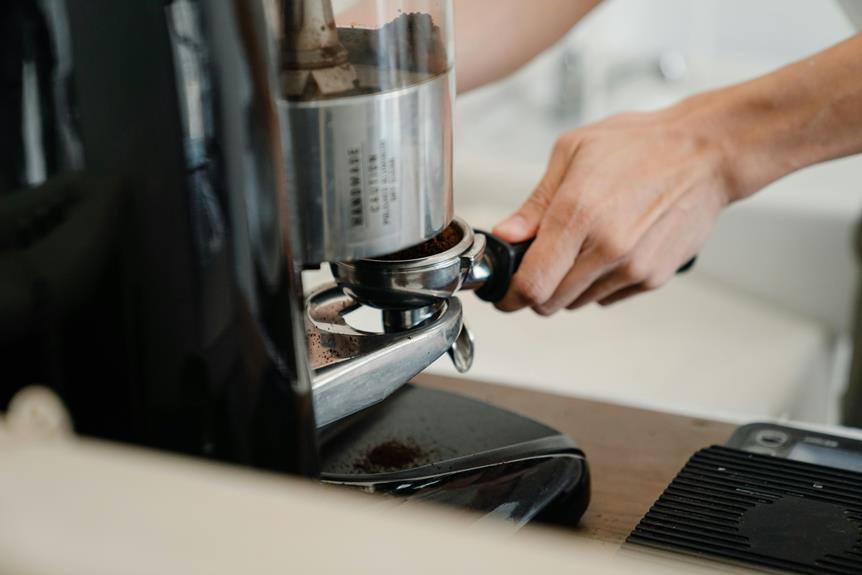
Clogged Grinder Hopper
A clogged grinder hopper is a common issue that can bring your coffee-making routine to a grinding halt, and it's often caused by coffee beans clumping together or oil buildup.
When this happens, you'll notice the beans aren't flowing smoothly into the grinder, and you might even see them stuck in the hopper. This is usually due to a poor hopper design or inadequate bean flow.
To troubleshoot this issue, start by cleaning the hopper and grinder thoroughly.
Use a brush or cloth to remove any oil or debris that might be causing the clog.
If the problem persists, try adjusting the hopper's angle or position to improve bean flow.
You might also need to adjust the grind setting or type of coffee beans you're using.
Some beans are more prone to clumping than others, so experiment with different roasts or brands to find one that flows smoothly.
Inconsistent Grind Size
You're likely familiar with the frustration of inconsistent grind sizes, which can greatly impact the flavor of your coffee.
When your grinder produces uneven grinds, it's challenging to achieve a balanced brew.
To troubleshoot this issue, start by examining the bean type you're using.
Different beans have varying densities, which can affect the grind distribution.
For instance, lighter roasts tend to be denser than darker roasts, requiring a more precise grind.
Check your grinder's settings and adjust them according to the bean type.
If you're using a burr grinder, verify that the burrs are clean and free of debris.
Dirty burrs can cause inconsistent grinds, so give them a good cleaning and try again.
Also, inspect the grind distribution pattern.
Is it uneven or clumpy?
Adjust the grinder's settings to achieve a more uniform grind.
Jammed or Broken Blades
Now that you've tackled inconsistent grind sizes, another common issue that might be plaguing your coffee grinder is jammed or broken blades.
This problem can be frustrating, but it's often preventable with proper blade maintenance. Regularly cleaning your blades will help prevent buildup and jamming. Use a soft brush or cloth to wipe away any debris or old coffee oils that might be hindering the blades' movement.
If your blades are already jammed, try disassembling the grinder and cleaning out any blockages. If a blade is broken, it's likely due to poor material quality. Consider investing in a high-quality grinder with durable blades that can withstand frequent use.
When shopping for a new grinder, look for blades made from stainless steel or other durable materials that are less prone to breaking. To avoid future jamming, make sure to grind coffee beans in small batches and avoid overloading the grinder. This will put less strain on the blades and reduce the likelihood of jamming.
Grinder Producing Dust
If your coffee grinder is producing excessive dust, it's likely because the beans are being ground too fine, causing the coffee particles to become aerosolized.
This can lead to a messy and frustrating grinding experience.
To troubleshoot this issue, try adjusting the grind setting to a coarser level.
This should reduce the amount of dust produced and result in a better-tasting cup of coffee.
Another possible cause of dust production is static buildup within the grinder.
Static can attract coffee particles, causing them to become airborne and create dust.
To combat static, make sure to clean your grinder regularly and consider using a dust collection system or a grinder with built-in anti-static features.
You can also try grinding a small amount of rice or other absorbent material to help neutralize static electricity.
Unusual Noise or Vibration
Your coffee grinder's unusual noise or vibration during operation can be a symptom of worn or loose parts, indicating a need for maintenance or replacement.
If you're experiencing an unusual racket or vibration while grinding, don't ignore it – it's trying to tell you something. Check if the grinder's parts are properly aligned. Misaligned parts can cause the grinder to vibrate excessively or produce weird noises. Make sure all components are securely fastened and properly positioned.
Another common culprit behind unusual noise or vibration is worn bearings. Over time, bearings can wear out, causing the grinder's moving parts to malfunction and produce strange sounds. Inspect the bearings and replace them if necessary.
You might also want to check for blockages or debris that could be causing the grinder to work harder than usual, resulting in unusual noise or vibration. By identifying and addressing these issues, you can restore your coffee grinder to its peak performance and enjoy a smooth, quiet grinding experience.
Incorrect Grind Settings
Incorrect grind settings can be a major contributor behind inconsistent coffee grinds. First, check your grinder's settings and make sure they're calibrated correctly. Grind calibration is essential to achieve the perfect grind.
If your grinder has adjustable settings, try tweaking them to see if it makes a difference.
Next, inspect the grind adjustment dial or button. Is it stuck or loose? Clean it gently with a soft brush or cloth to remove any debris. If the issue persists, you might need to reset the grinder to its default settings.
Consult your user manual for guidance on how to do this. Remember, setting adjustments can be a trial-and-error process, so be patient and don't be afraid to experiment.
Grinder Not Dispensing
Coffee grinds stuck in the grinder and refusing to dispense can be a real headache, especially when you're in a hurry to brew your morning coffee.
Don't panic, though – it's often an easy fix. First, check for blockages in the grinder's dispensing mechanism. You can do this by removing any visible grinds from the dispenser and checking for any clogs or buildup. If you find a blockage, clear it out and try grinding again.
If that doesn't work, it's possible that your grinder's blockage detection feature is malfunctioning. Consult your user manual to see if there's a way to reset or recalibrate this feature.
Another common issue is improper dispenser calibration. If the dispenser isn't calibrated correctly, it can prevent grinds from dispensing properly.
Check your user manual to see how to calibrate the dispenser on your specific grinder model. If you're still having trouble, try resetting the grinder to its factory settings and recalibrating the dispenser from scratch.
With a little patience and troubleshooting, you should be able to get your grinder dispensing grinds like normal again.
Motor Overheating Issues
After resolving dispensing issues, another common problem that may arise is motor overheating, which can bring your grinding to a halt.
Motor overheating is often caused by excessive use, clogged grinds, or poor maintenance.
To troubleshoot, start by checking if your grinder has a built-in motor protection feature. This feature automatically shuts off the motor when it reaches a certain temperature to prevent damage.
If your grinder doesn't have this feature, make sure to take regular breaks to allow the motor to cool down. Additionally, maintain proper thermal management by keeping your grinder clean and dust-free.
Regularly clean the grinder's vents and fans to guarantee air can circulate freely. By taking these precautions, you can prevent motor overheating and keep your grinder running smoothly.
Frequently Asked Questions
How Often Should I Clean My Coffee Grinder to Prevent Issues?
You should clean your coffee grinder every 1-2 weeks, depending on usage, to prevent issues. Establish a regular grinder maintenance routine and stick to a cleaning schedule to keep your grinder in top shape.
Can I Use a Coffee Grinder to Grind Other Types of Beans?
You can experiment with grinding various bean varieties, like vanilla or cocoa, in your coffee grinder, but be cautious when switching to spice grinding, as oils can linger and affect flavors.
Are Coffee Grinders Suitable for Grinding Nuts or Seeds?
"Oh, you think your coffee grinder is a superhero, don't you? Newsflash: it's not! While it can handle some nuts, you'll end up with chunky nut butter. And don't even get me started on seeds – their texture will drive you nuts (pun intended)!"
Can I Leave My Coffee Grinder Plugged in When Not in Use?
You're wondering if you can leave your coffee grinder plugged in when not in use. Honestly, it's not the most energy-efficient habit, as many appliances continue to draw power in standby mode, wasting energy and increasing your bill.
Are Coffee Grinders Dishwasher Safe for Easy Cleaning?
"Your coffee grinder is not a superhero, saving the day with dishwasher safety – sadly, it's not designed for that kind of rescue mission. For Grinder Maintenance, follow Safety Precautions and hand wash only to keep it in top shape."
Conclusion
You've made it to the end of our troubleshooting guide!
By now, you should be able to identify and fix common coffee grinder problems.
Remember, a well-maintained grinder is key to a perfect cup.
For instance, a coffee shop in Seattle was able to increase their daily grind output by 30% just by regularly cleaning their grinder's hopper and blades.
Take control of your grinder's performance and start brewing like a pro!